
- Other5Combat install
- Other5Characters install, Other5Combat needs it
Install them from the launcher's CREATE page. What each plugin provides
Before you start: follow Getting started, then on the launcher's CREATE page click INSTALL next to the two plugins above. Together they give your arena a character, weapons and health.
1. Make your plugin
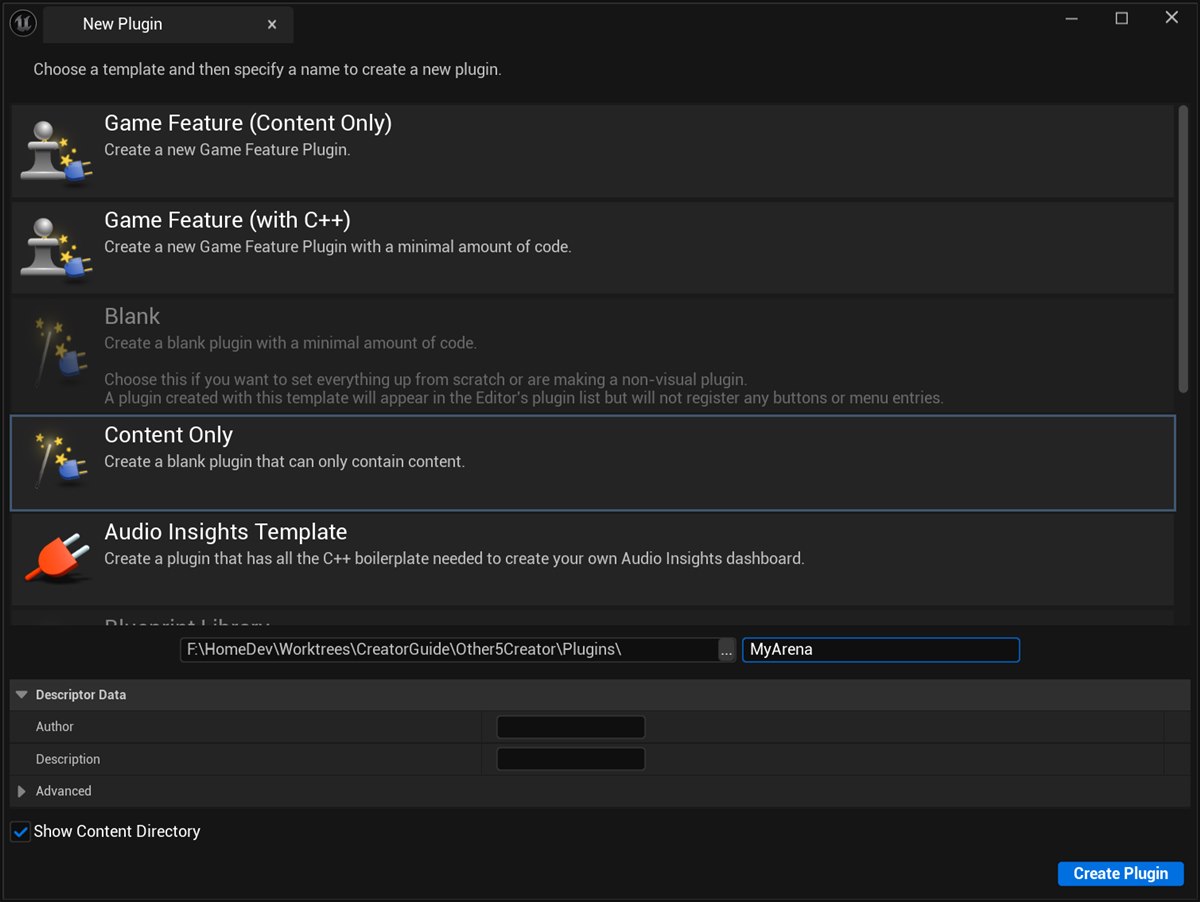
Every Creation lives in its own plugin. In Unreal, open Edit > Plugins, click + Add,
pick Content Only, name it (one word, for example MyArena) and click Create Plugin.
2. Make a map
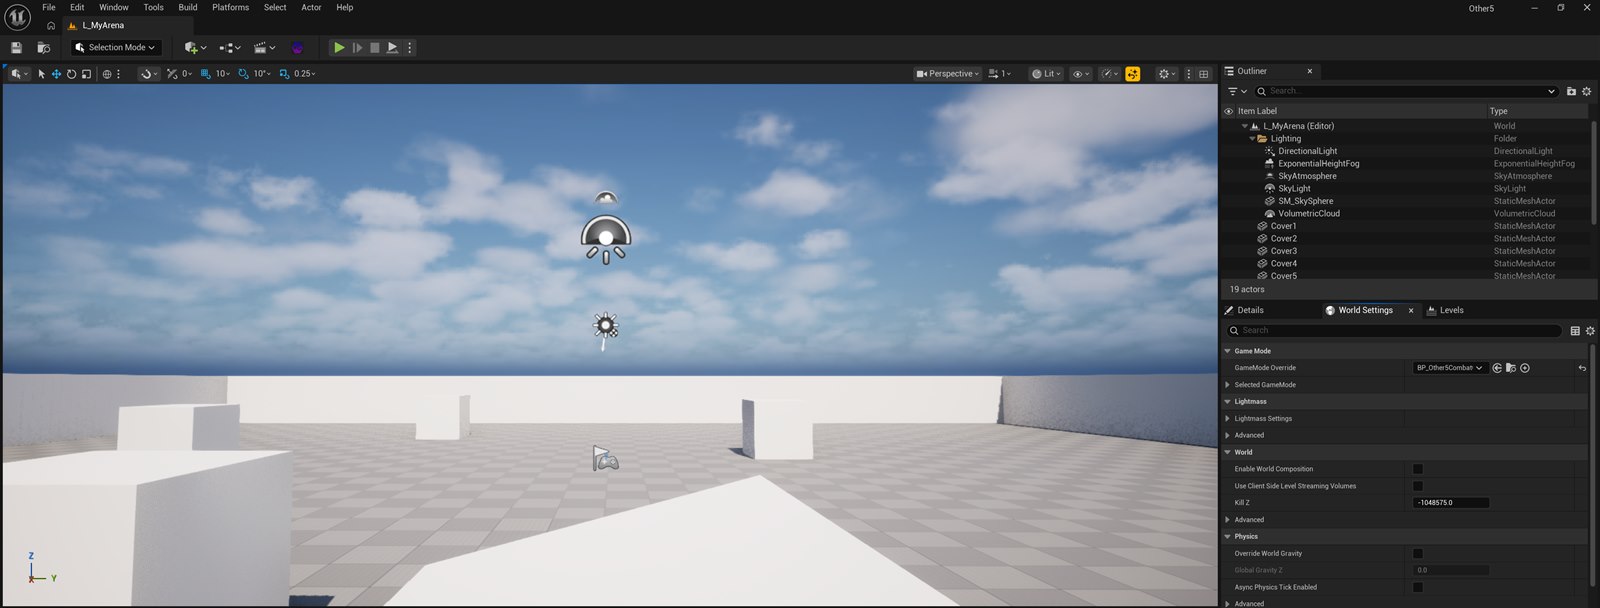
Open File > New Level, pick Basic and click Create. Build something: the
Add button on the toolbar has shapes to drop in. Then File > Save Current Level As, open
MyArena Content, make a Maps folder and save it there, for example as L_MyArena.
3. Pick the gameplay
Open Window > World Settings and set GameMode Override to BP_Other5CombatGameMode. Click Play on the toolbar to try it.
4. Label your folder
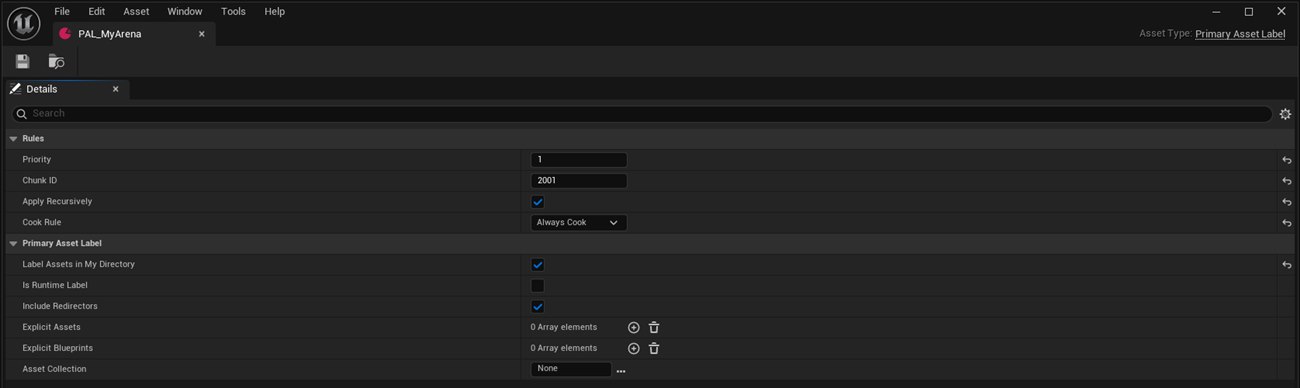
The label tells Other5 what goes in your Creation's download (a .pak file). In the Content Browser,
right-click in MyArena Content and pick Miscellaneous > Data Asset >
PrimaryAssetLabel. Name it PAL_MyArena, open it and set:
- Chunk ID: a number from 2000 up, different for each folder you make (Other5's own plugins use the 1000s);
- Apply Recursively and Label Assets in My Directory: ticked;
- Cook Rule: Always Cook.
5. Publish it
Click the Other5 Tool button on the toolbar and sign in with your Other5 account. Give your Creation a
Name and Version, then tick your folder and every plugin folder your map uses (here
/Other5Combat; the Tool ticks /Other5Characters too, since Other5Combat needs it). Under Who sees it, tick Registered users so your friends can play it.
When the checklist is all green, click Publish. The first cook takes a few minutes.
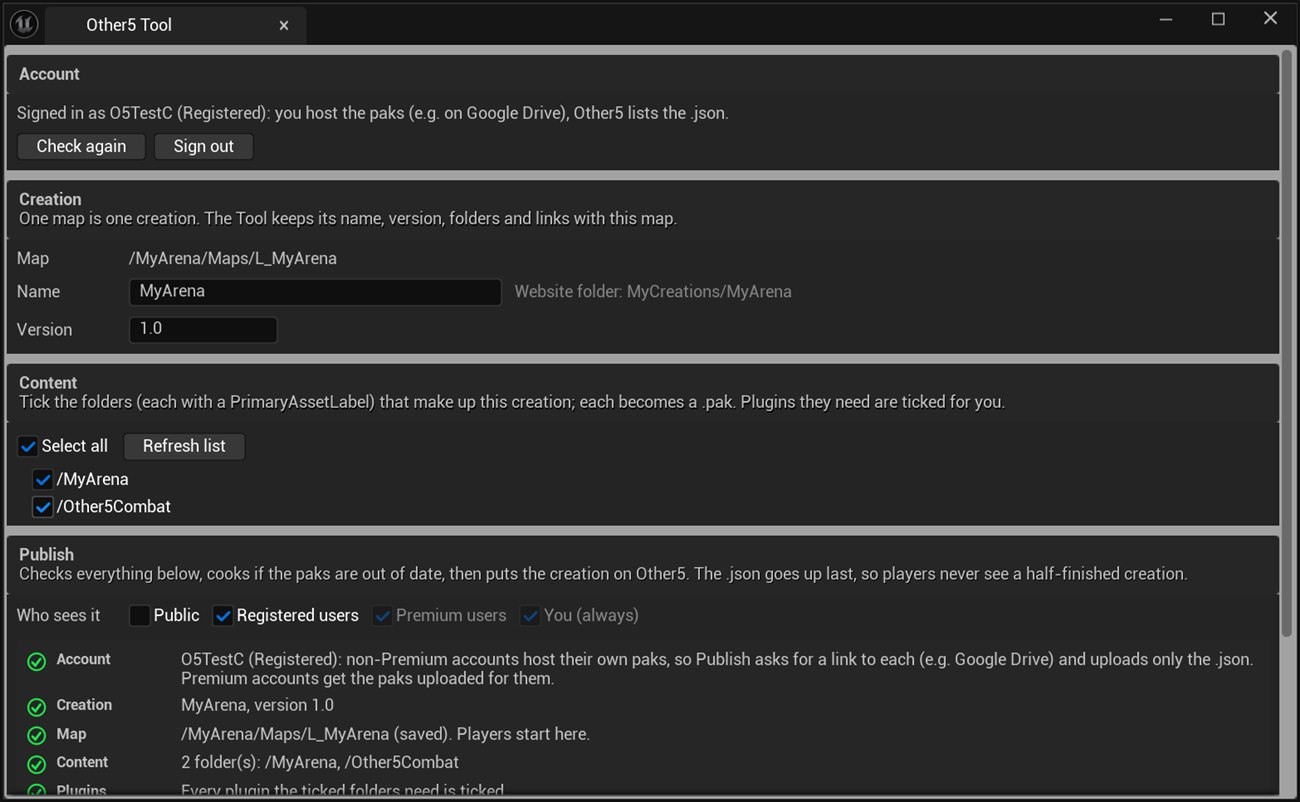
Premium: Publish is one click. With Other5 Premium on Patreon, Publish uploads your paks to Other5 for you: no Google Drive, no links to paste, and an update only sends what changed. You're done at this step.
6. Free accounts: host the paks on Google Drive
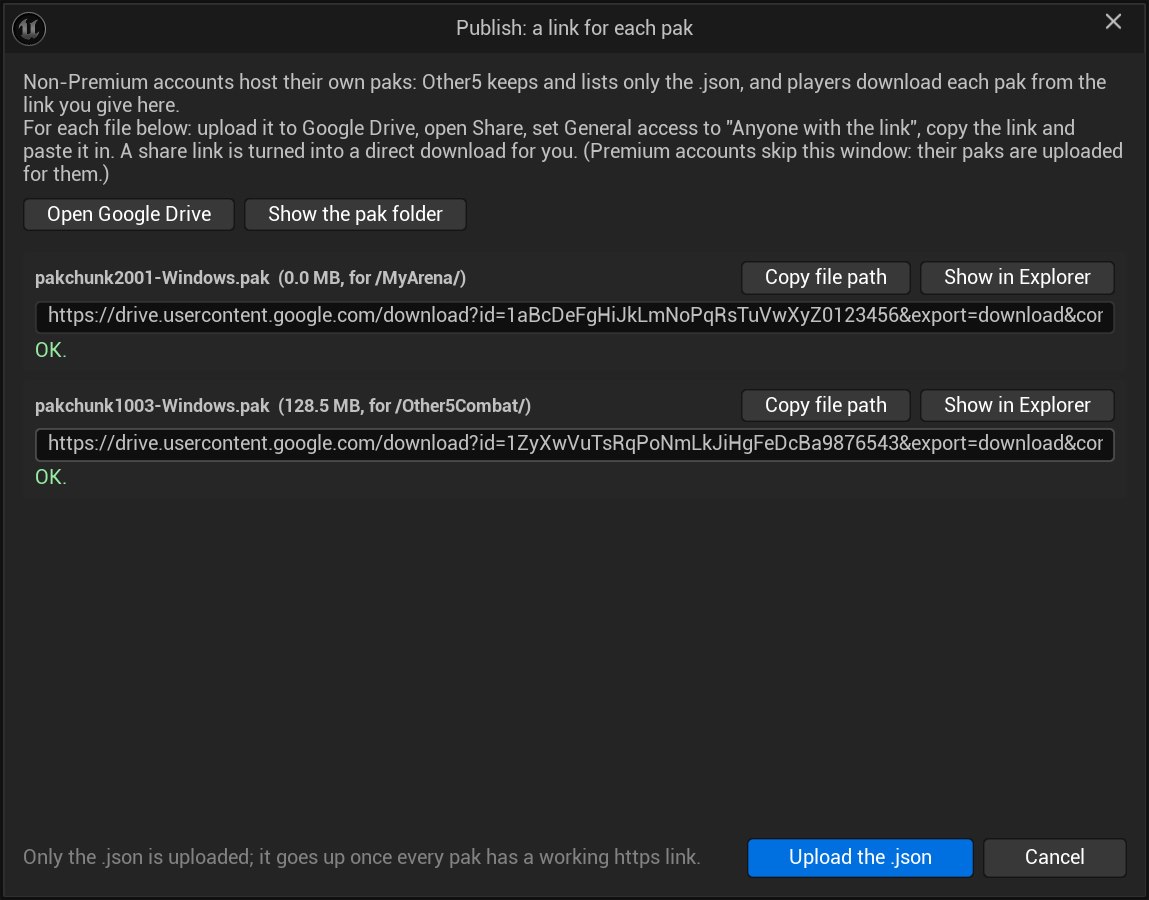
Publish then lists each pak with a box for its link: yours, and one for each plugin you ticked. For each one:
- Click Show in Explorer and drag the file into Google Drive (free, 15 GB).
- In Drive, right-click the file > Share, set General access to Anyone with the link and click Copy link.
- Paste the link into the Tool. It turns it into a direct download and says OK.
Click Upload the .json. Other5 lists your Creation; players download the paks from your Drive.
- The game downloads paks only from Google Drive and Other5, so other hosting won't work.
- Changed your map? Publish again. In Drive, use Manage versions to upload the new pak over the old one: the link stays the same.
- Drive limits how often a file can be downloaded in a day, so a very popular Creation can be paused for a while. Premium hosting has no such limit.
7. Start a server
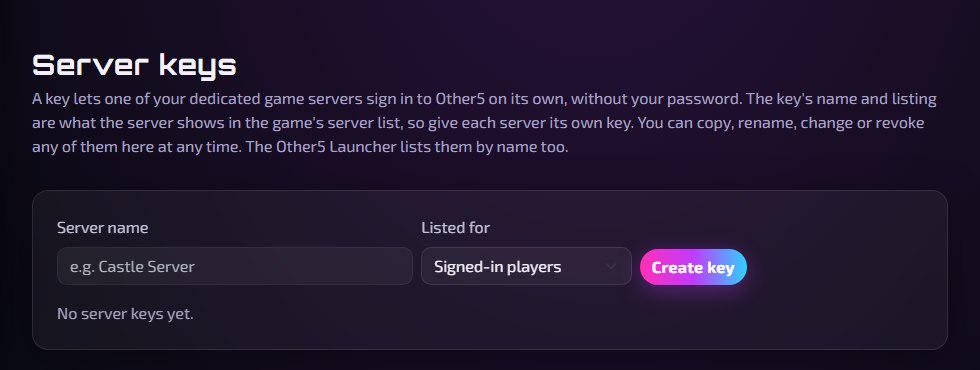
A server needs a key. On your Dashboard, open Server keys, give the server a name and click Create key.
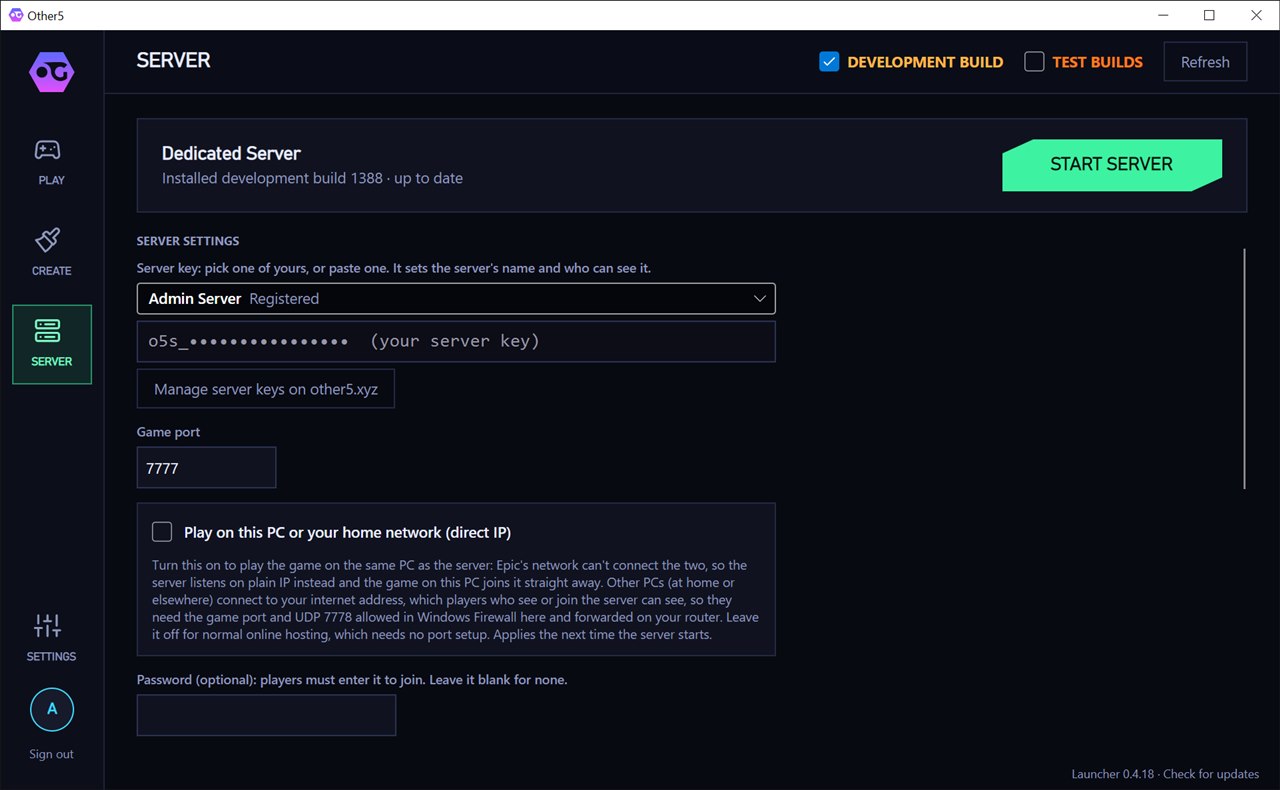
In the launcher's SERVER page, pick your key, choose your Creation and click START SERVER.
8. Play with friends
Friends sign in to the launcher, open PLAY, find your server and click Join. The game downloads your Creation for them. Where they are decides how you host:
- On your home network: tick Play on this PC or your home network (direct IP). You can then play on the same PC as the server.
- Anywhere in the world: leave it off. The server goes online through Epic's network with no router setup, but the game can't join a server on its own PC that way, so run the server on a second computer and play on yours.
- No second computer? Host it on AWS, free: the launcher's HOST ON AWS button runs your server on your own free Amazon Web Services project, and everyone joins it from the server list.
Next
- Run your server in the cloud for free: Host on AWS, free.
- Let players change your controls: Remappable controls.